Brooke Stevens Interior Designer

Born and raised in Colorado, Brooke wanted to experience life on the east coast and started her higher education at University of New Hampshire, focused on Human Development and Family Studies. She went on to transfer to CSU and ultimately graduated with a bachelor’s degree in Family and Consumer Sciences. After her university experience, Brooke discovered her true passion lies in Interior Design, and earned her master’s certificate from Heritage School of Interior Design in Denver. As a newcomer to the interior design scene, Brooke has loved learning something new every day, and gaining practical knowledge and experience.

As a world class rock climber, Brooke spends her free time focused on extreme mountaineering in the beautiful Rocky Mountains. Just kidding... she’s outdoorsy in that she likes long walks on the beach with a margarita in hand. As a self-proclaimed “city girl” Brooke loves exploring the many eclectic neighborhoods and rooftop patios that Denver has to offer, but has been known to be persuaded to go white-water rafting and zip-lining through the woods as long as she can spend more time with friends and family.

Tricia Guy Business Development Specialist & Senior Designer


As the youngest of four girls, Tricia quickly became her father’s resident assistant on all home projects.  Inspired by the endless creative capabilities in each project, Tricia knew design and construction was where she wanted to dedicate her career.  After graduating with her bachelor’s degree in Interior Design from The Illinois Institute of Art, Tricia has gained experience from a wide range within the design field:  from high-end residential to commercial interiors.  Working within the Senior Living design market established an instant connection with Tricia and has since been her focus for the past 10 years. Tricia’s positive outlook, passion for architectural design, and dedication to collaboration has created lasting relationships with industry partners looking to design and experience a unique blend of hospitality driven design with an emphasis of resident comfort.


Since relocating to Denver in 2018 from Wisconsin, Tricia enjoys experiencing everything Colorado has to offer.  When she’s not in the mountains enjoying a hike with her significant other Eric and their fur-son Renzo, you can find her teaching her other passion, Pilates, to friends and family alike.

Paisley Director of Human Resources


As Director of Human Resources, Paisley’s number one priority is boosting team moral. Equipped with a feel-good attitude and playful spirit, Paisley’s lighthearted approach to the office environment brings a sense of joy and comfort to both co-workers and clients alike.

When not in the office, Paisley can be found exploring the many trails and streams Steamboat has to offer, along with her best Hiking Buddies- Aneka and Brian. Dubbed “The Furricane” by her mom Aneka, Paisley brings a little spark of sunshine to whatever room she bounces in to.

How to Hang Art

How to Hang Art

How to Hang Art: Accenting Your Interior Design

Art can make one of the largest impacts in completing your space, like the cherry on top of any good ice cream sundae. It can also be one of the easiest things to be unsure about- How high do you hang something? What’s the correct spacing between pieces? Does everything need to match? These are questions we get all the time, and relatively easy to answer, so we’ve taken the time below to detail some of the easiest Do’s and Don’ts when it comes to hanging art.

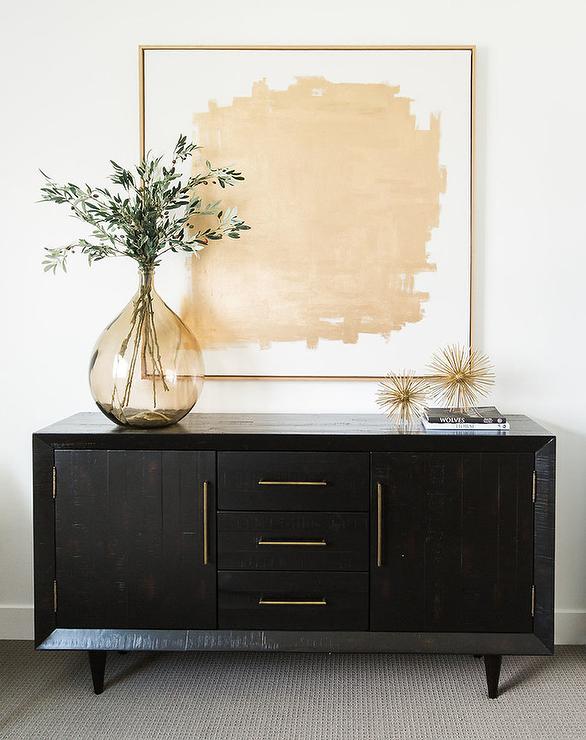
1. Hanging Art Above Furniture

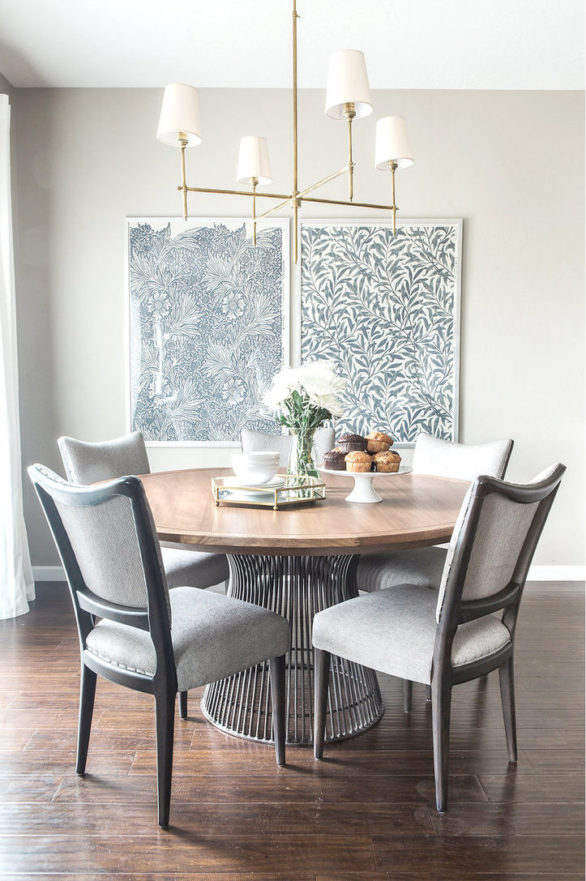
When hanging a piece of art over a credenza or console table or sofa, make sure the piece your hanging is less wide than the furniture below it. If the art is too wide, it causes the space to feel top heavy, and a little unbalanced.

  • Do: Hang the art so the bottom of the piece is about 4-6 inches above your furniture piece.
  • Don’t: Hang the art too high, it’ll make the pieces look disconnected, like your art is floating in space instead of grounded above the furniture.

2. Gallery Wall

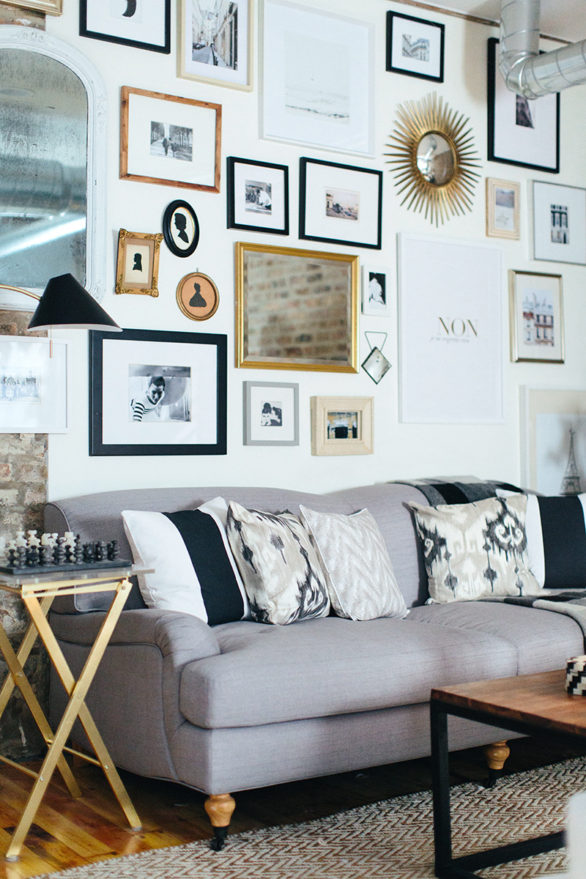
Gallery Walls can be intimidating, but it’s one of the easiest ways to fill large walls and display a unique collection.

  • Do: Pick a theme. If there is something consistent throughout the gallery wall, i.e. maybe all the frames are gold, or all the images are black and white photography, it’ll feel like every piece is apart of the larger picture.
  • Do: Vary your sizes. Create a unique blend of large, medium, and small wall decor to create more interest.
  • Do: Hang an odd number. The human eye inherently likes things in odd numbers like 3, or 13, so pick an odd number of pieces when creating your gallery wall.
  • Don’t: Jump in too quickly. We always suggest measuring out your wall space on the floor in front, and creating an almost “template” on the floor by laying out all of your pieces before you actually start nailing anything to the wall. This creates room for error, and hopefully less holes to patch up!

3. Hanging Height

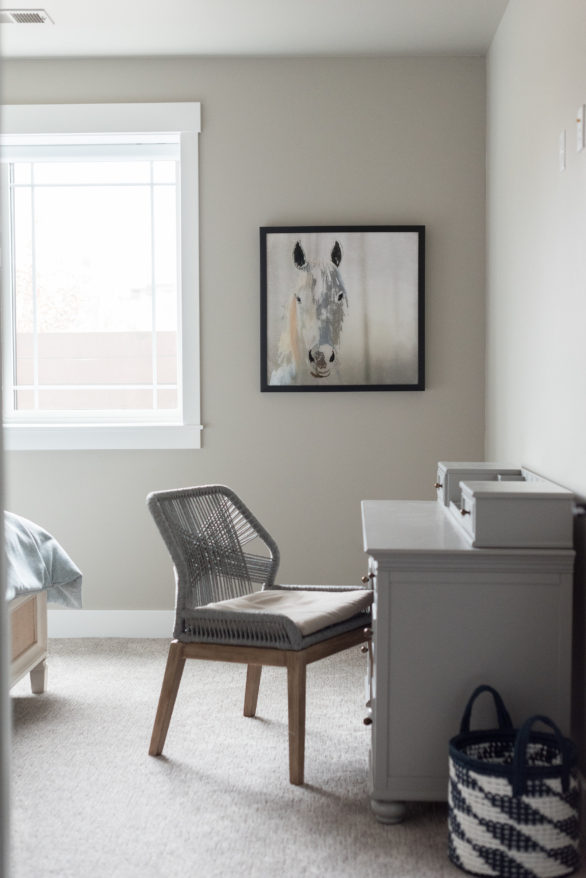
If you’re hanging art in a hallway, or on a blank wall and can’t decide how high to hang it, the general rule of thumb is 5 feet off the ground to the center of the piece of art. This is pretty standard for galleries, museums, etc., because 60” off the ground is the average eye height. This rule won’t work for EVERY piece because some could be smaller or larger than others, but it’s a good place to start, then adjust the height of the piece as needed.

4. Hanging in Pairs

Occasionally you’ll get a set of prints, photos or paintings that need to be hung as a diptych (two pieces) or triptych (three pieces). The Biggest mistake we see is hanging the individual pieces too far apart.

  • Do: Hang your art 2-4 inches apart from one another.
  • Don’t: Leave too much room between pieces, it makes them feel disconnected.
Tags: